Refer a Friend
Get $50 cash reward by referring Bluepeak.
We’re all about improving connectivity and growing opportunities in the heartland.
That’s why we’re expanding our fiber network every day.


The Voice Portal is a web-based application that provides you with visibility into and control over aspects of your voice services.
To access your voice portal an email address must be listed on your account with Bluepeak.
Upon upgrade or install of your Bluepeak services you will receive a Welcome email that will provide the link to your Voice Portal Account.
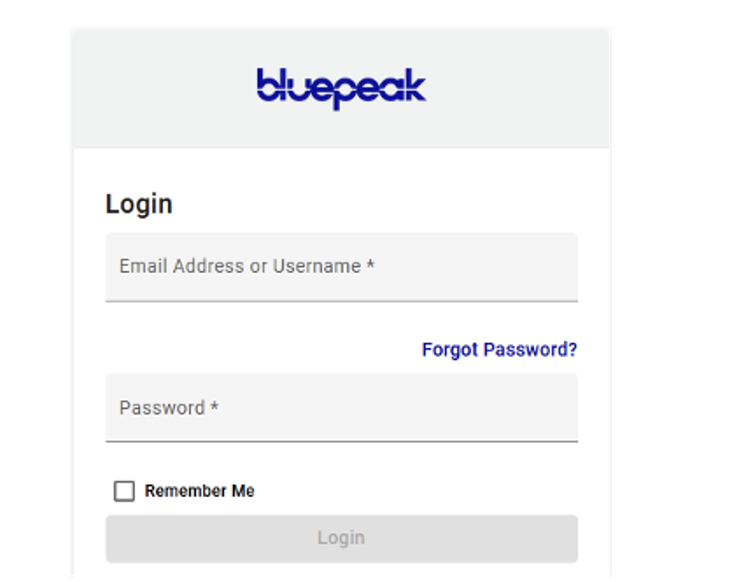
1. Go to https://voice.mybluepeak.com/login
2. Enter you username and password.
3. Check Remember Me if you want to save your username and password.
4. Click [Login].
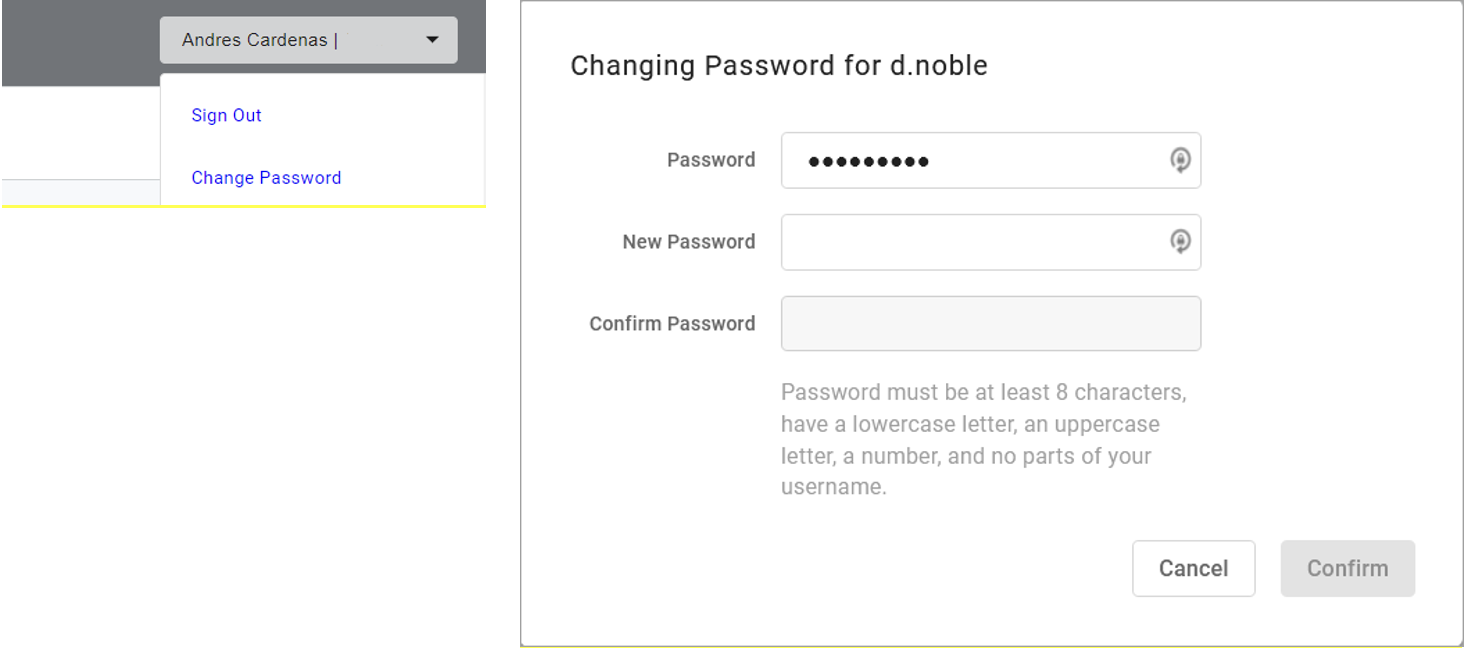
The first time you log in, you will be asked to create a new password. Your new password must include:
If you can’t log in, contact Customer Support to reset your password. But if you can log in, you can change your password in the Voice Portal.
1. Expand the drop-down menu in the top-right corner of the screen and click Change Password.
2. Enter your new password and then confirm it in the field below.
3. Click [Confirm].
Direct Access:
1. From a line assigned to your voicemail box, dial the Voicemail Management star code (*62 or *98).
2. Enter your voicemail PIN and press #.
Remote Access:
1. From a line not assigned to the voicemail box, dial your 10-digit phone number.
2. When the greeting plays, press #.
3. Enter your voicemail PIN and press #.
Portal Access:
Once you have set up your Voice Portal Account, you can now create your voicemail greeting. **Reminder – you must have an email account set up with Bluepeak to use the Voice Portal**
In the Voice Portal, you can upload your voicemail greetings and personal name recordings, view and manage any saved messages, and set up voicemail forwarding to email.
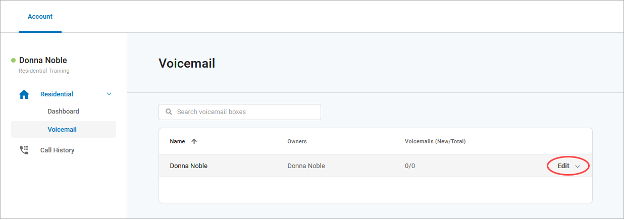
Hover over a voicemail box and click Edit on the right to view the details.
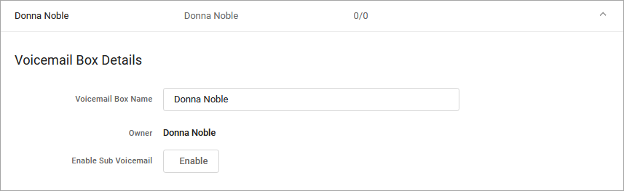
Voicemail Box Name: The name of the voicemail box. The name can be edited here, if necessary.
Owner: The user assigned to this voicemail box.
Enable Sub Voicemail: Click [Enable] to add a sub voicemail box (a box within a box). If it’s already enabled, this button will say [Disable]. See Sub Voicemail for more information.
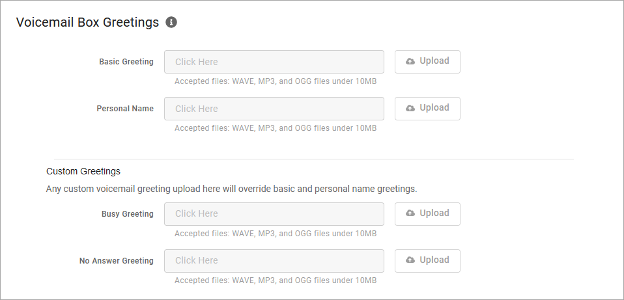
Users can upload and download their voicemail greetings and personal name recordings. Click the field to select a file from your computer, then click [Upload]. The upload will accept WAVE, MP3, and OGG files that are less than 10MB.
Voicemail messages saved to the box are listed here. Messages can be sorted by Time/Date, Length, and Status (New or Saved). Hover over an individual message to see the management tools on the right.
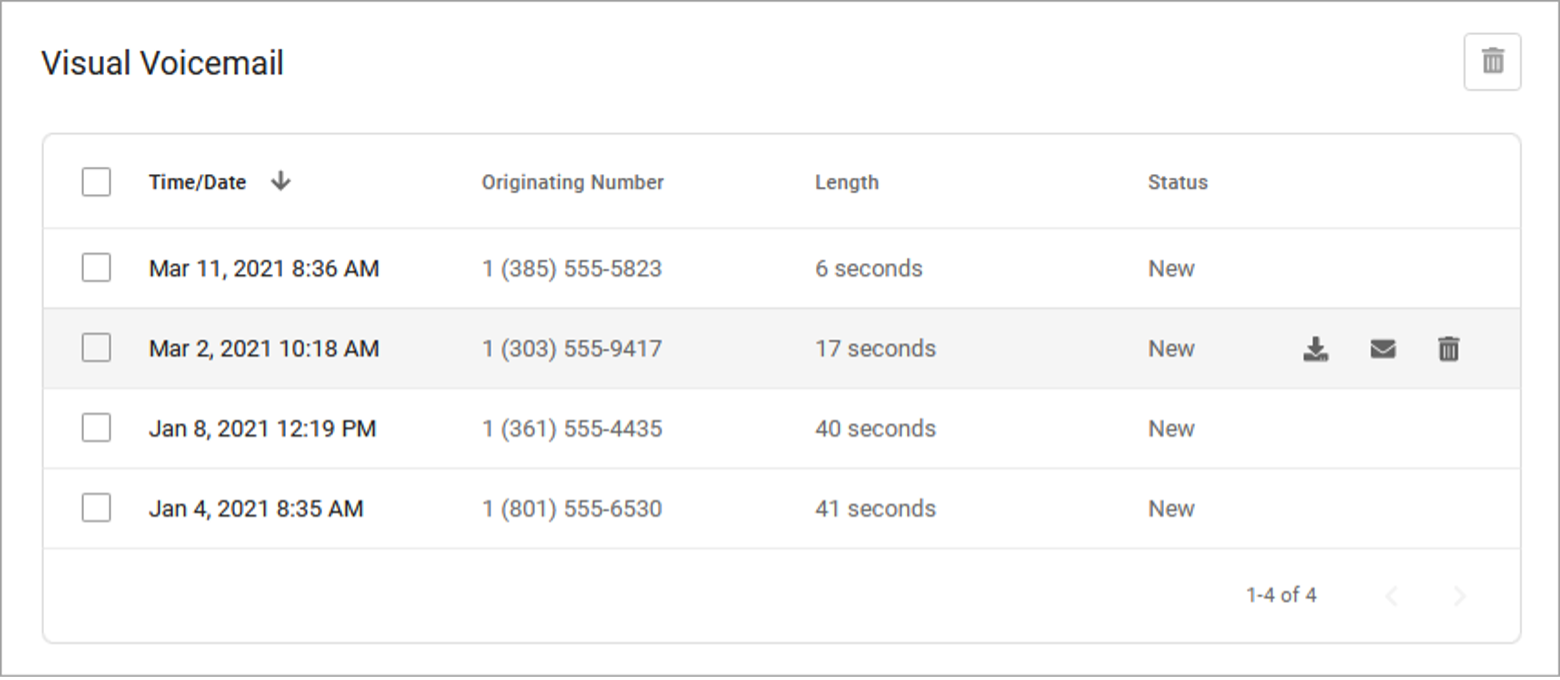
Download: Save a copy of the message to your computer as an MP3 file.
Save: Change the status of the message to Saved.
Delete: Delete this message from the box.
To delete all or multiple messages at once, select the message on the left and then click the trash icon at the top right.
Messages left on the user’s voicemail box can be forwarded as an MP3 file to one or more email addresses. Users also have the option to keep a copy of the message in their voicemail box when it’s forwarded.
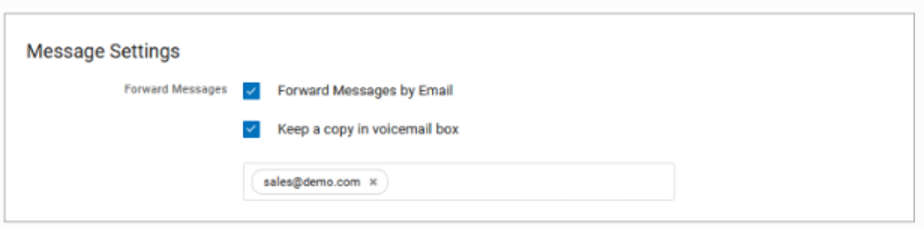
1. Check Forward Voicemail to Email.
2. Keep a Copy in Voicemail Box o When checked, the message waiting indicator (MWI) on the user’s device will stay on until they’ve listened to or deleted the message from their voicemail box.
3. Enter one or more email addresses, each separated by a comma.
4. At the bottom of the section, click [Save]
The voicemail menu can be accessed remotely or by dialing a star code from a phone connected to the account.
The default PIN is 1234. The first time the voicemail box is accessed, the user will be prompted to set a new PIN which must be 4-digits or longer.
Direct Access:
1. From a line assigned to your voicemail box, dial the Voicemail Management star code *62 or *98
2. Enter your 4-digit PIN and press #.
Remote Access:
1. From a line not assigned to your voicemail box, dial your 10-digit phone number.
2. When the voicemail greeting plays, press #.
3. Enter your 4-digit PIN and press #.
Voicemail Menu:
Once logged in, press 1 to listen to your messages. Use the following to navigate the menu:
About the Voicemail PIN:
Once logged in, press 8 to access your personal options:
Personal Options:
Change PIN:
1. Access your voicemail box and press 8.
2. Press 1 to change the PIN.
3. Enter a new PIN that is at least 4-digits long, then press #.
4. When you’re done, hang up or press 0 to go back to the main menu.
Change Greetings:
1. Access your voicemail box and press 8.
2. Press 2 to change your greetings.
3. When you’re done, hang up or press 0 to go back to the main menu.

